Step-by-step guide to set up a RabbitMQ transformer
Step 1: Transformer creation
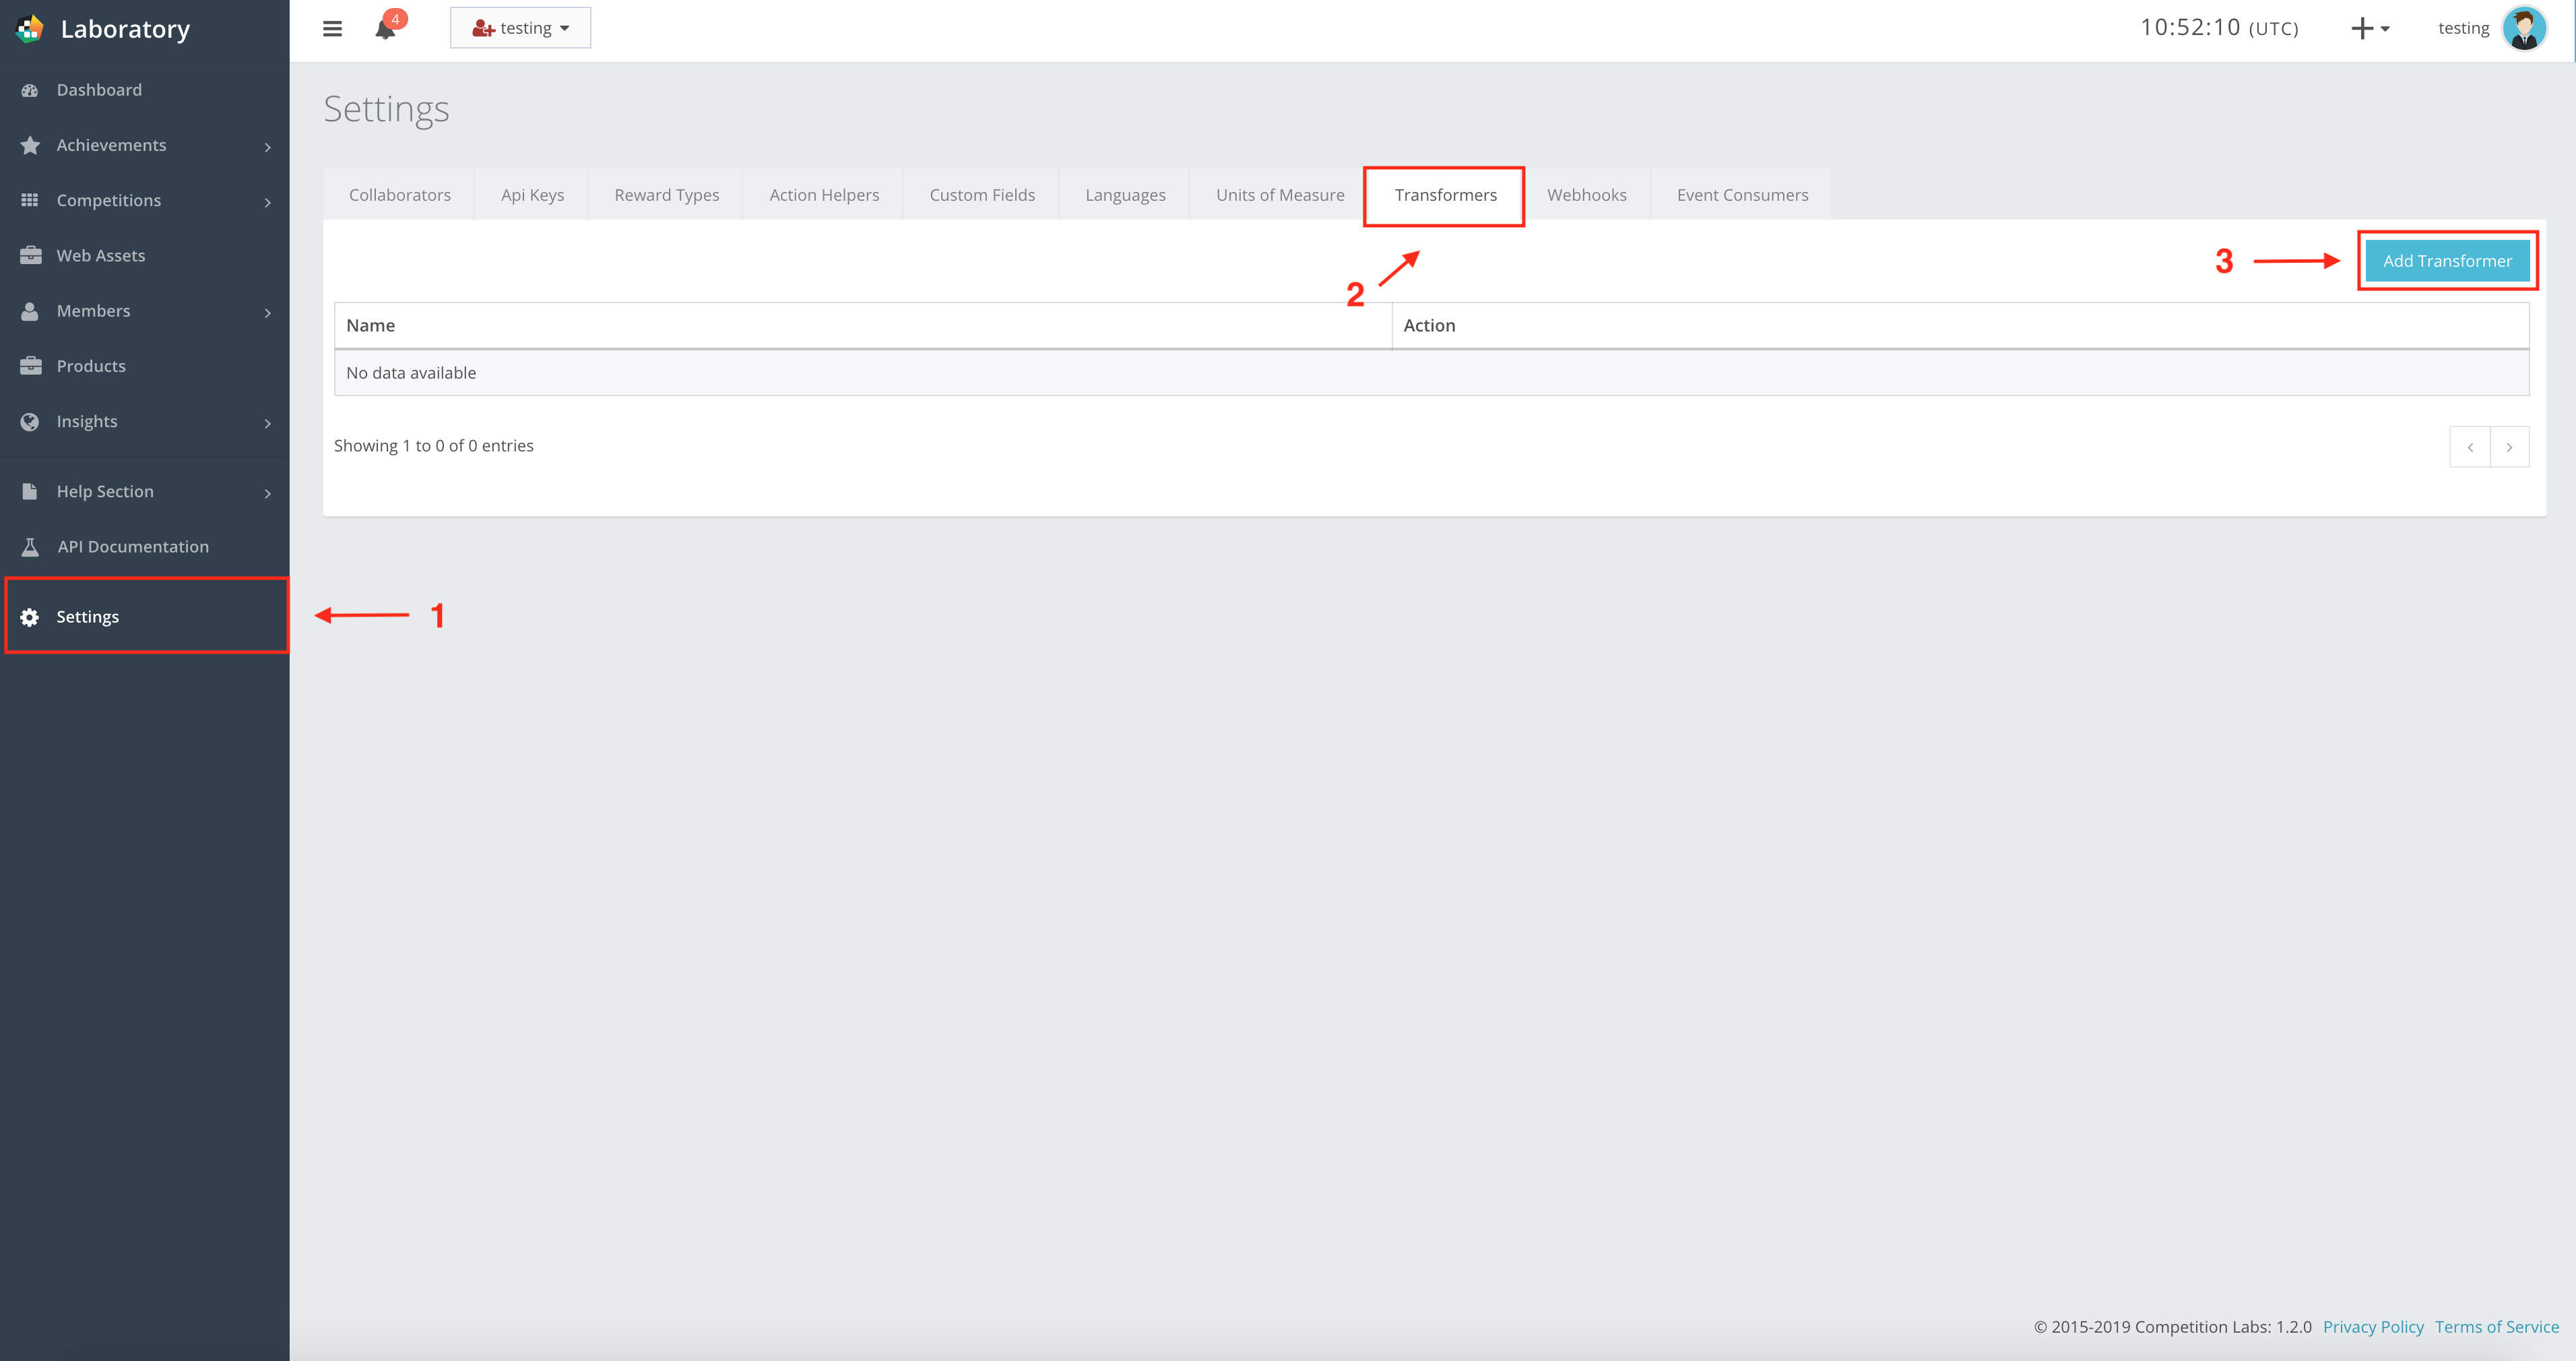
Press Add Transformer for a new pop-up window, where you enter the new transformer label, as shown in the example.
Transformer creation fields
Name StringMandatory| The label of the transformer. |


If all steps were correct, the Transformer will be created in the Settings → Transformers, as shown in the example. After creation, you can Edit the transformer, you can Edit the code of the transformer, or Delete it from the list.
Step 2: Writing code for the transformer
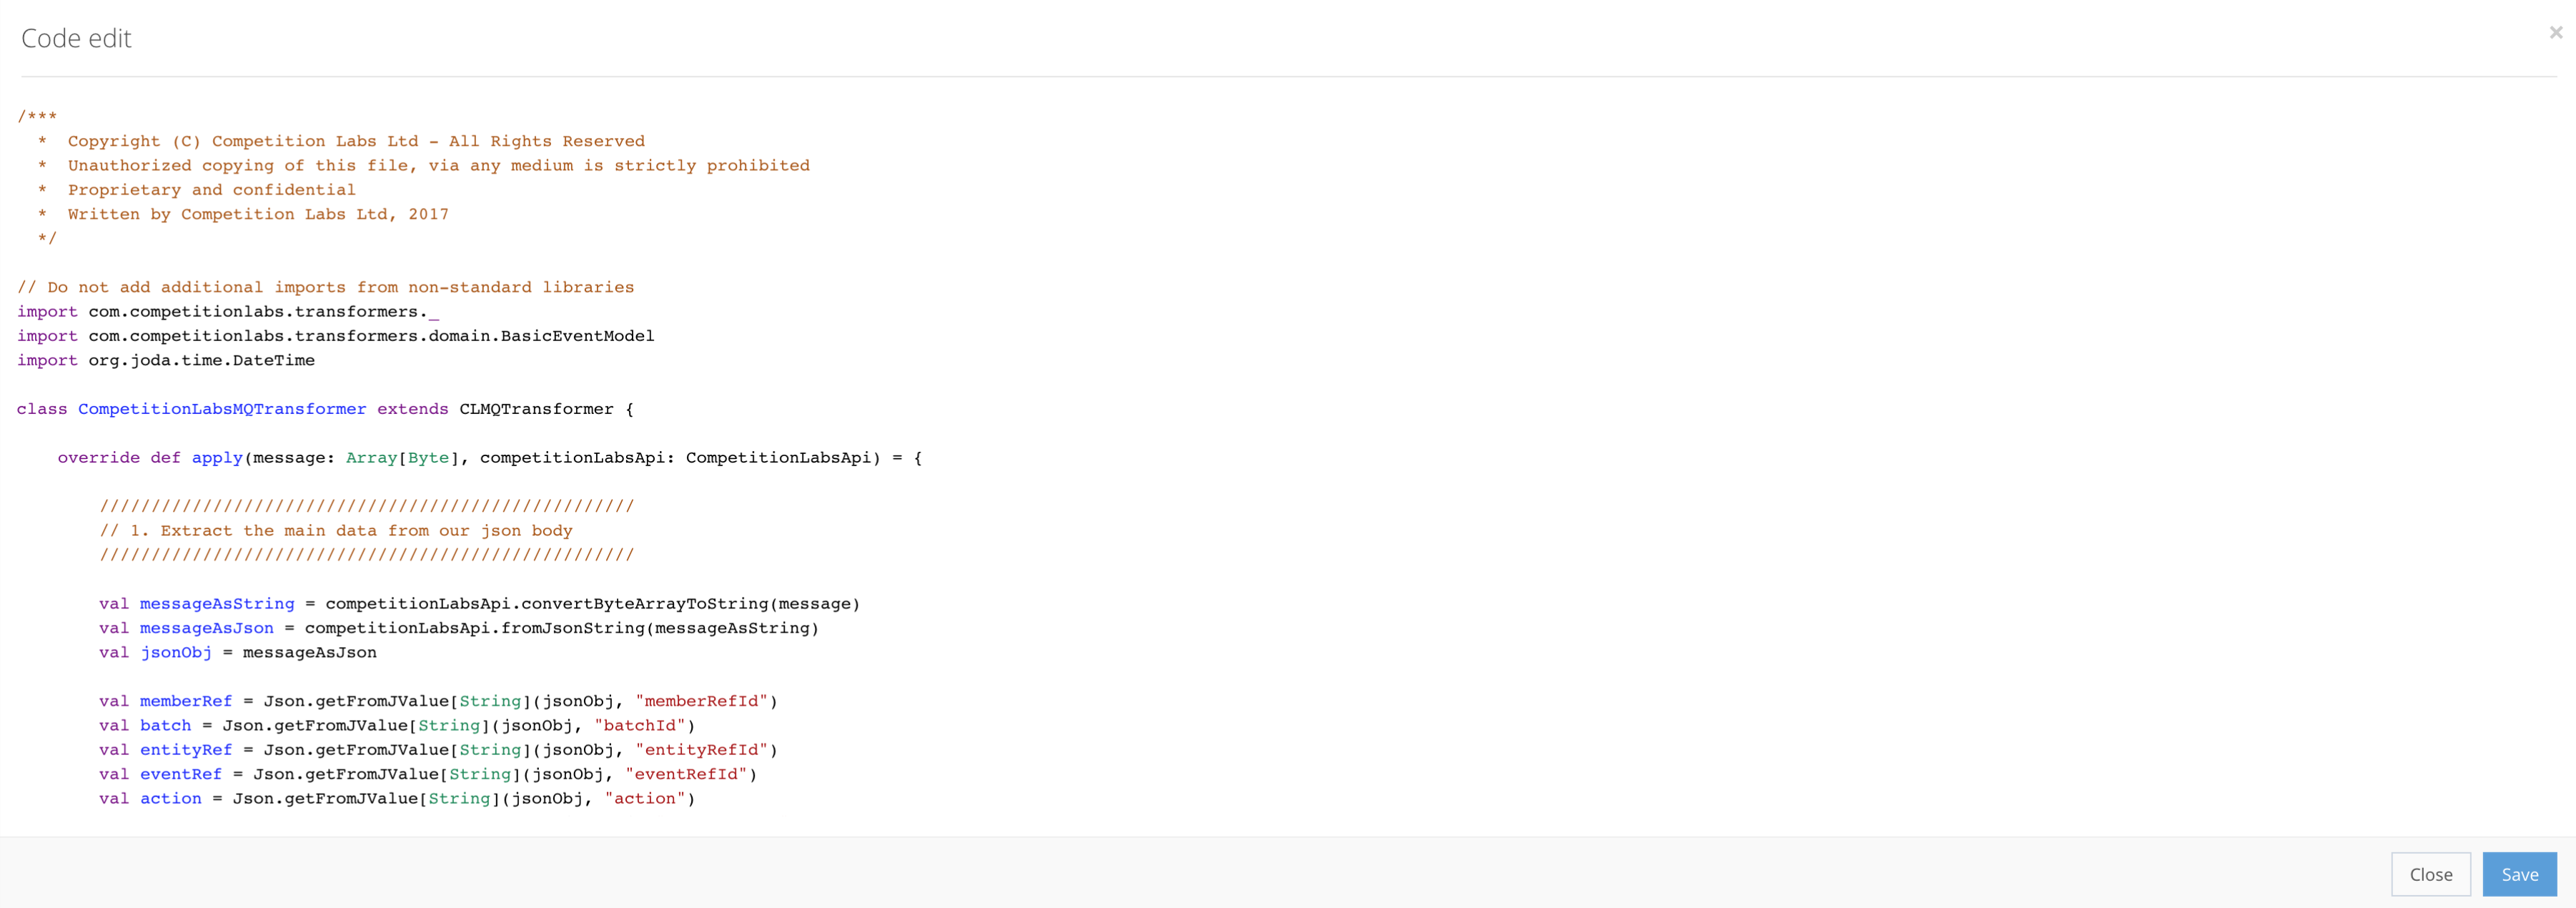
To enter your transformer’s code, press ![]() Code edit for a new pop-up window where you can enter your code, as shown in the example.
Code edit for a new pop-up window where you can enter your code, as shown in the example.
Step 3: Event Consumer creation
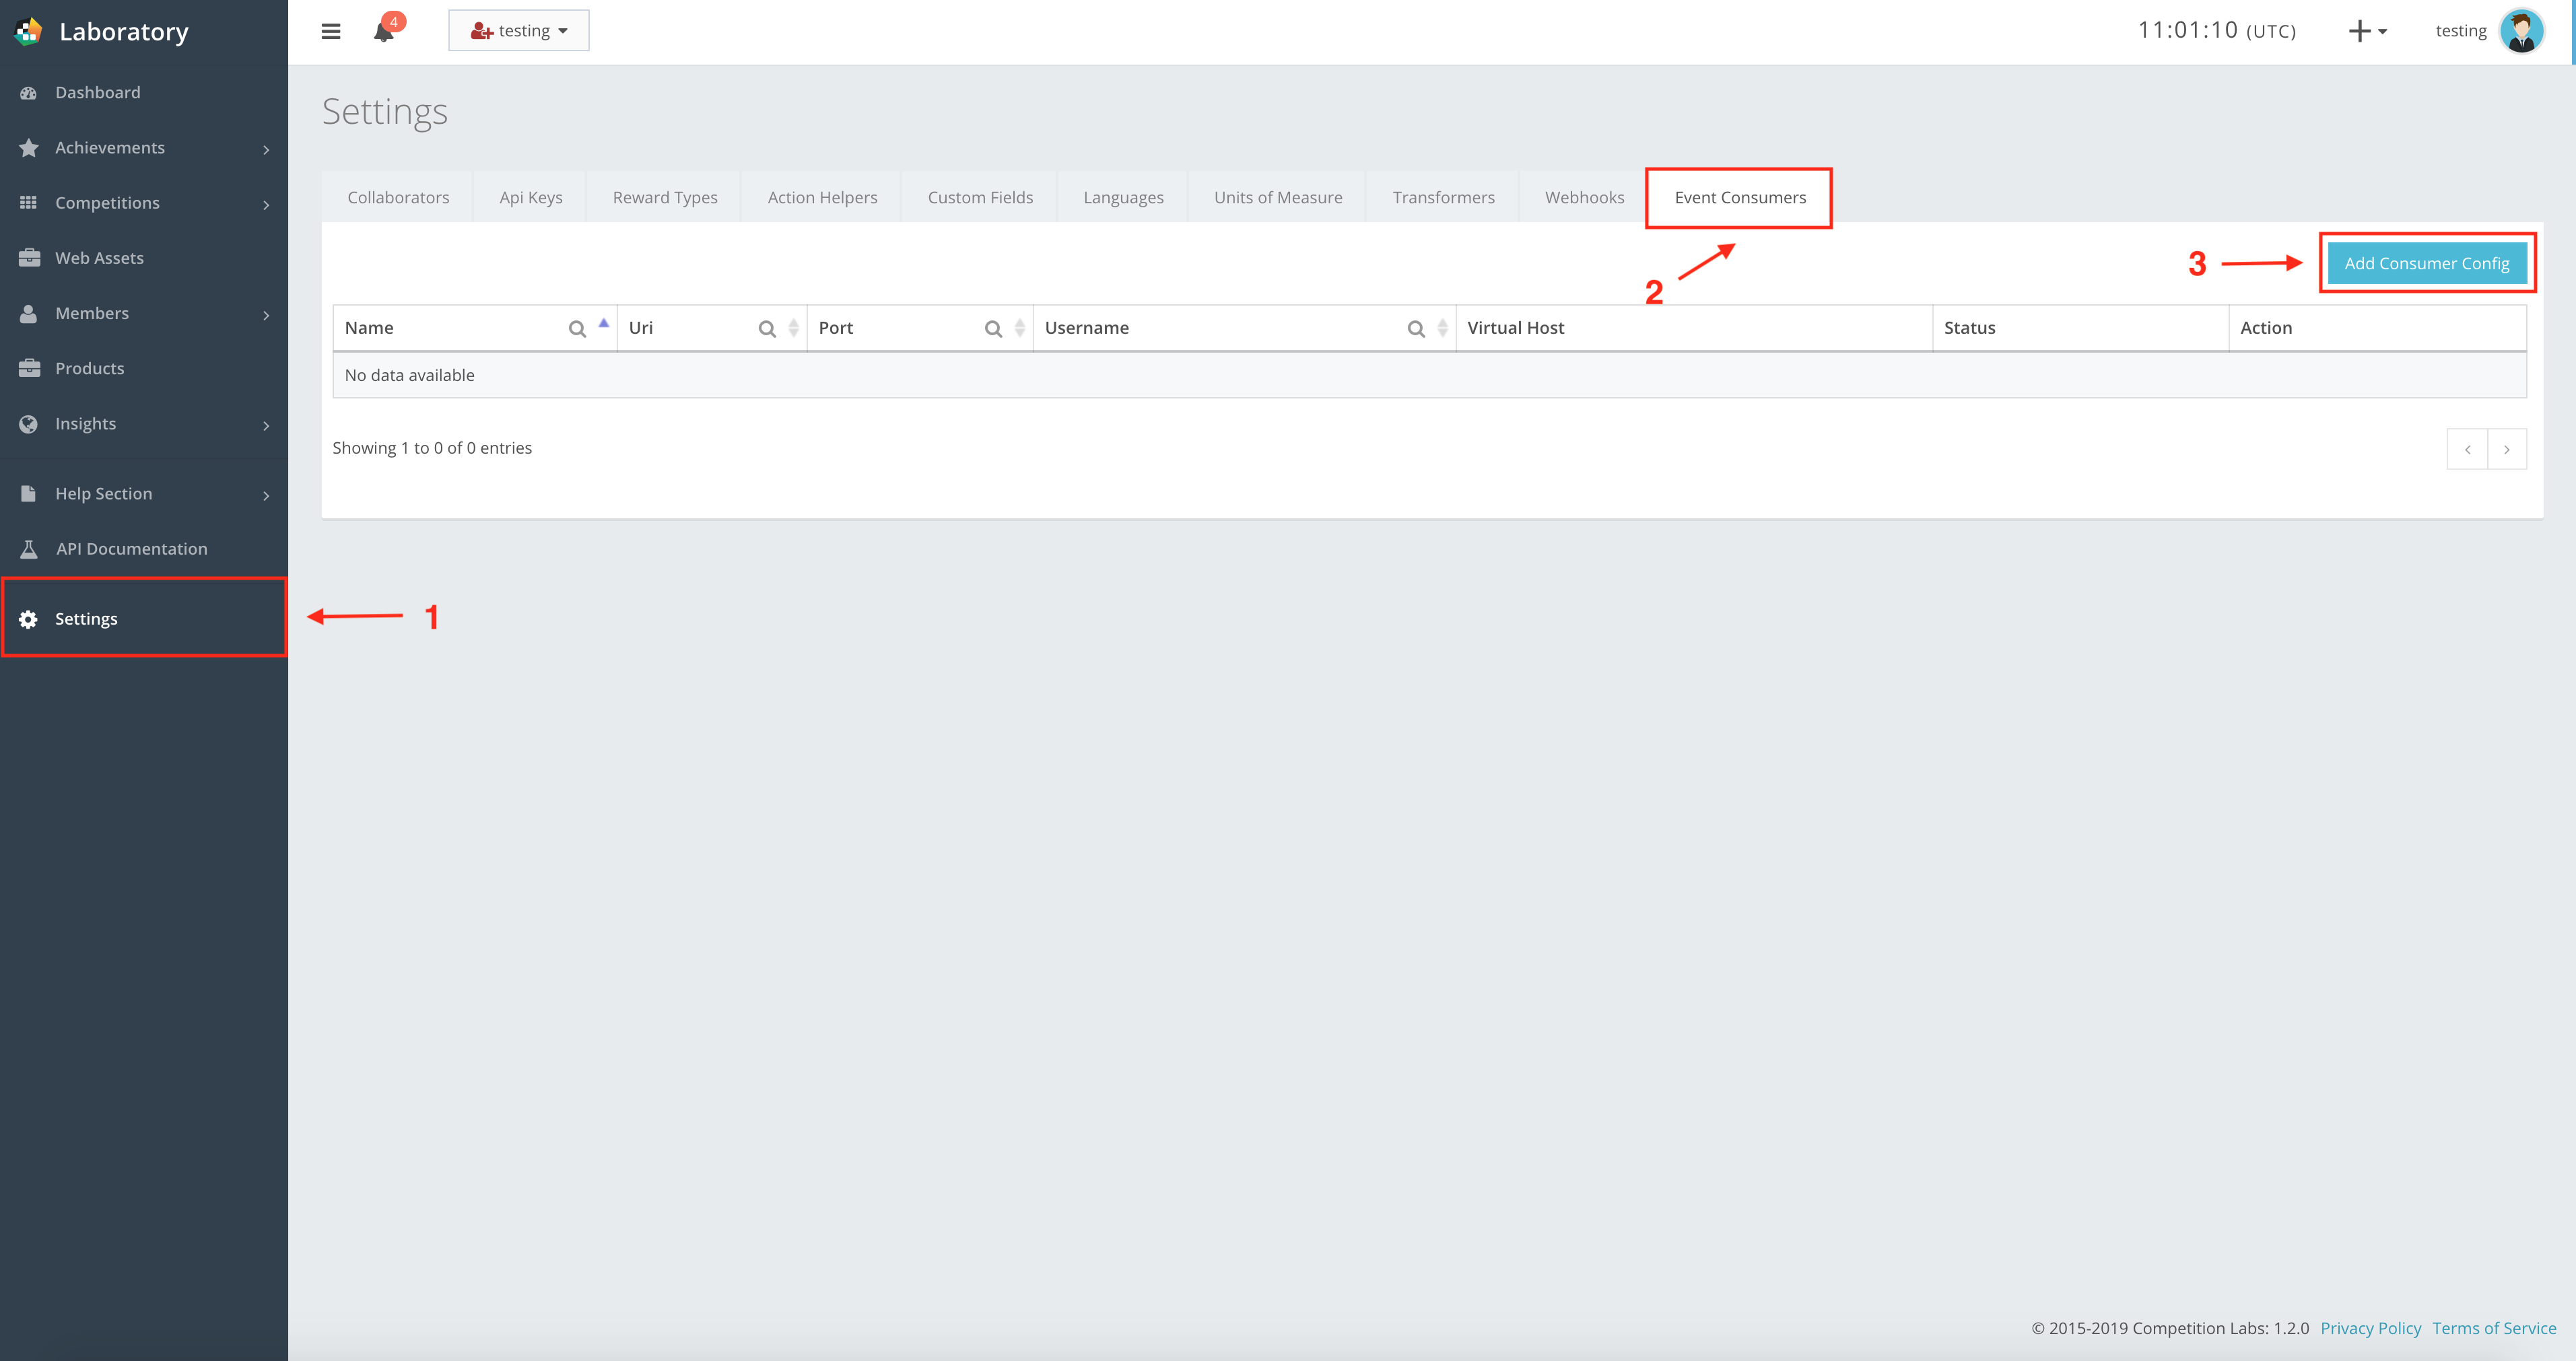
Now navigate to Event Consumers -> Add Consumer config for a new pop-up window where you enter the new Consumer information, as shown in the example.
Fill out all the information, and in the Transformers field select the RabbitMQ Transformer. If all the information is filled out correctly, press Save to create the event consumer.