This tutorial will guide you step by step in how to create a basic Achievement with an action helper that has an image displayed feature. The image display feature is used in the rules for action helpers.
Step-by-step guide to create a simple achievement with an image display feature
Step 1: Action helpers
In your CompetitionLabs space, navigate to Settings → Action Helpers
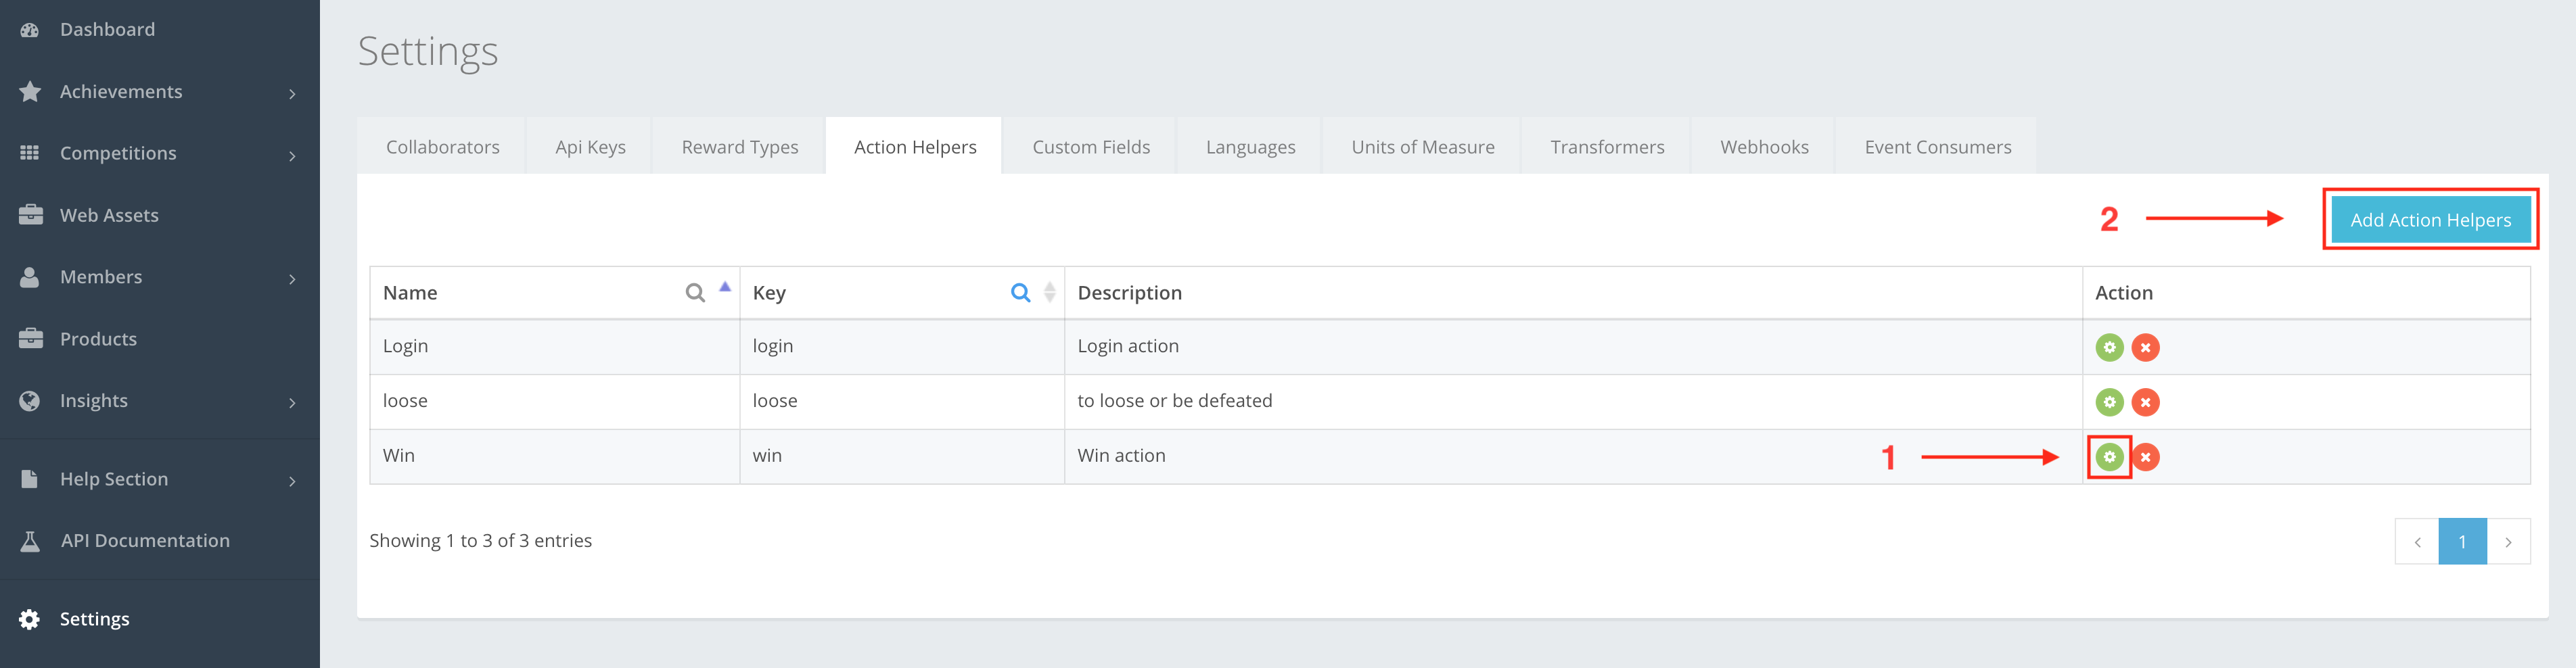
Step 1.1: EDIT
| To update your existing Action Helpers, navigate to the Action Helper of your choice and press the Edit button. |
Step 1.2: CREATE
| You can create a new Action Helper by using the Add action helper button. |
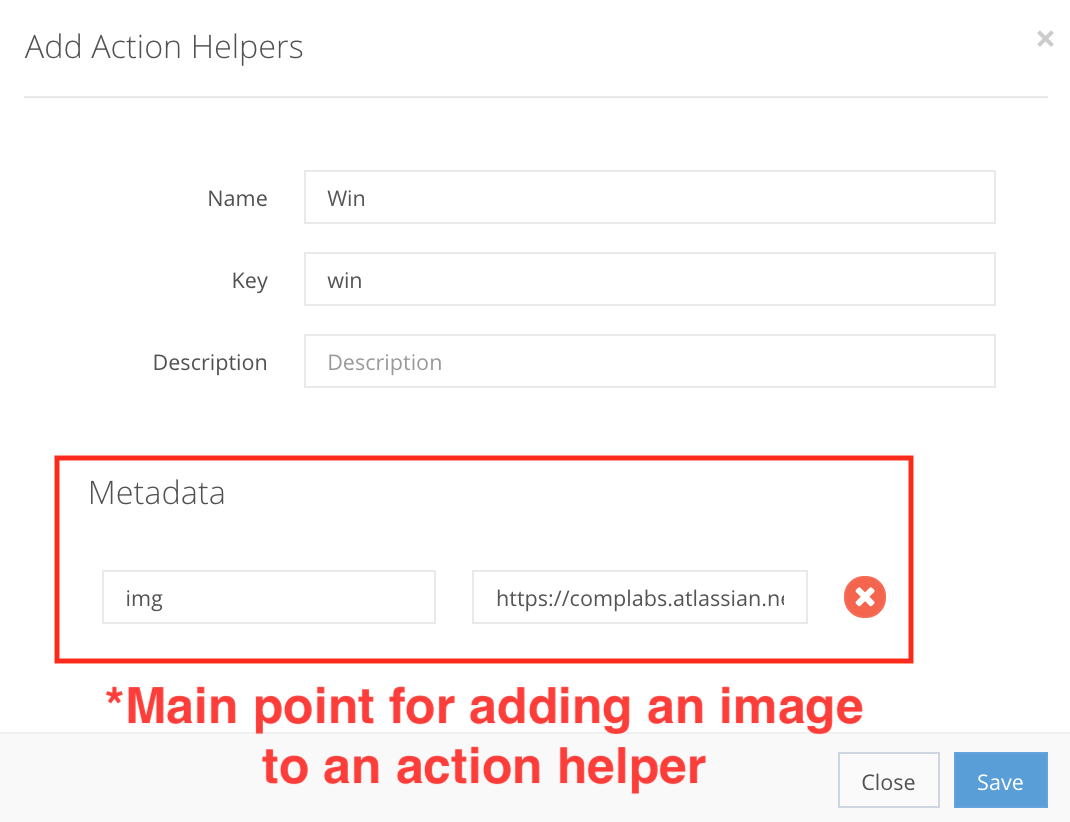
Step 2: Adding an image to the Action Helpers
From Step 1 you are navigated to the Action Helpers Create/Edit screen where you fill out the information of the Action helper.
Action Helper fields
Name StringSet Name to – Win
Key StringSet the key to – win
Description StringWin action helper
•Metadata Object- Key – has to contain a text – img
- Value – has to be a link to the image that you want to display – https://complabs.atlassian.net/wiki/download/thumbnails/696090637/trophy.png?version=1&modificationDate=1557221627227&cacheVersion=1&api=v2&width=100&height=100
Image example »
Step 3: Products
In your CompetitionLabs space, navigate to Products.
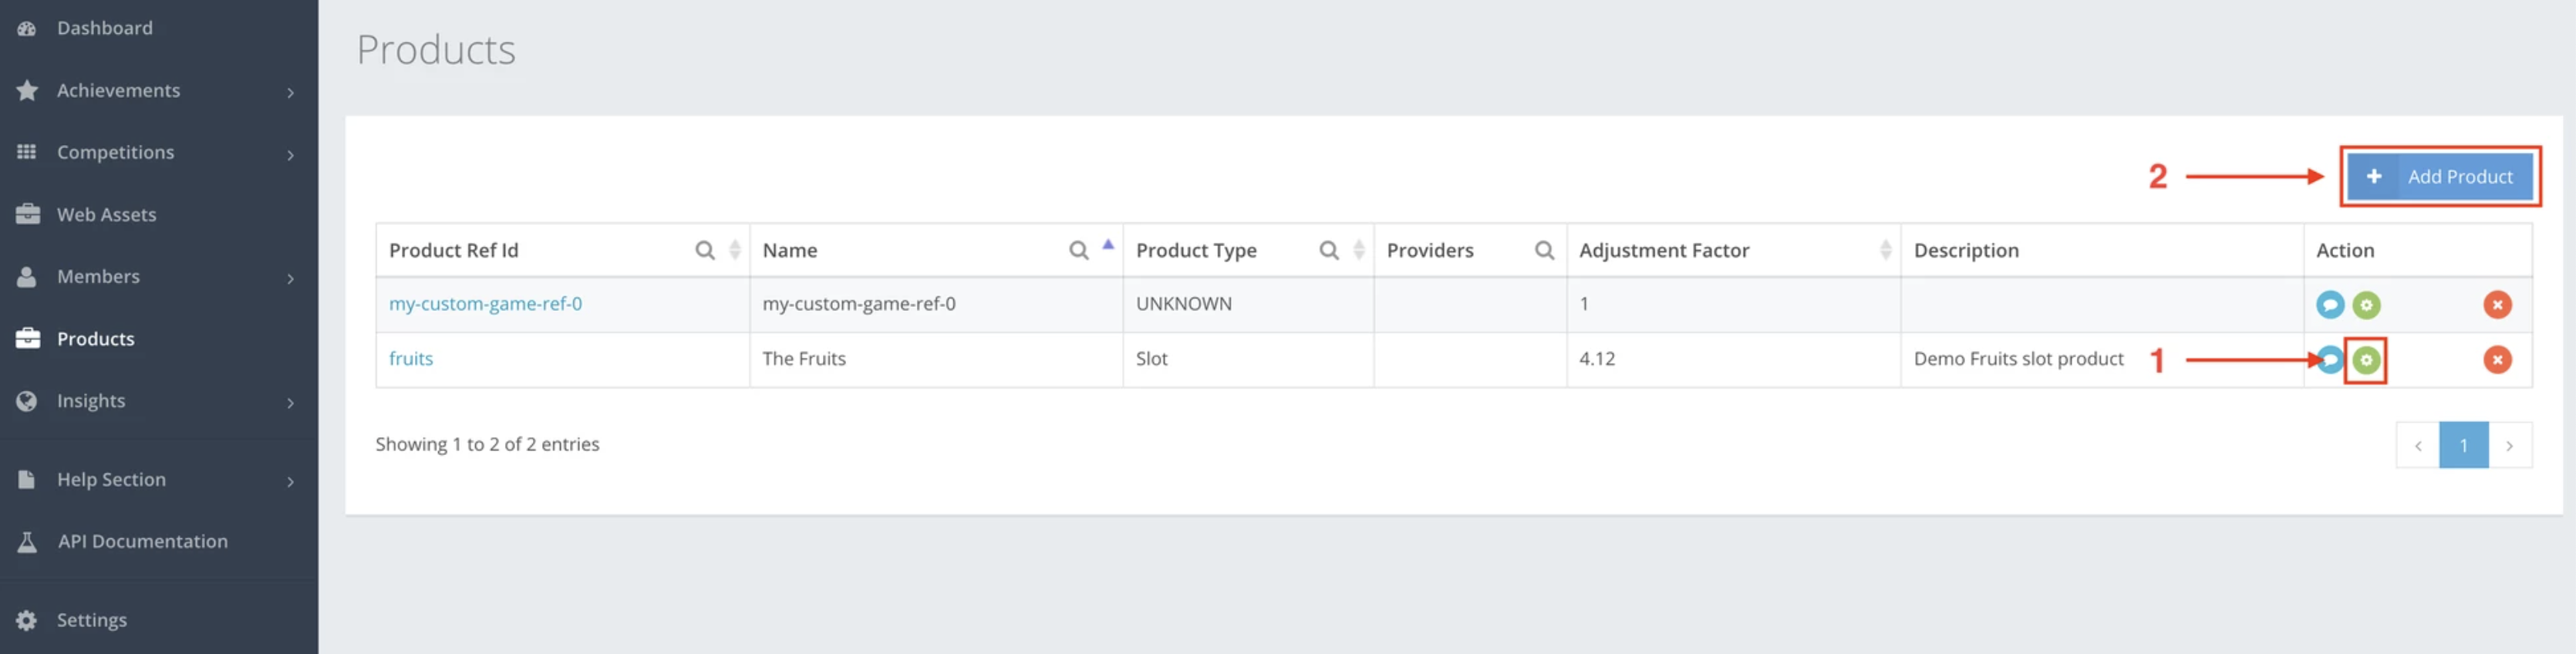
Step 3.1: EDIT
| To update an existing Product, navigate to the product of your choice and press Edit. |
Step 3.2: CREATE
| To create a new Product, navigate to and press Add Product. |
Step 4: Adding the action helper to the Product
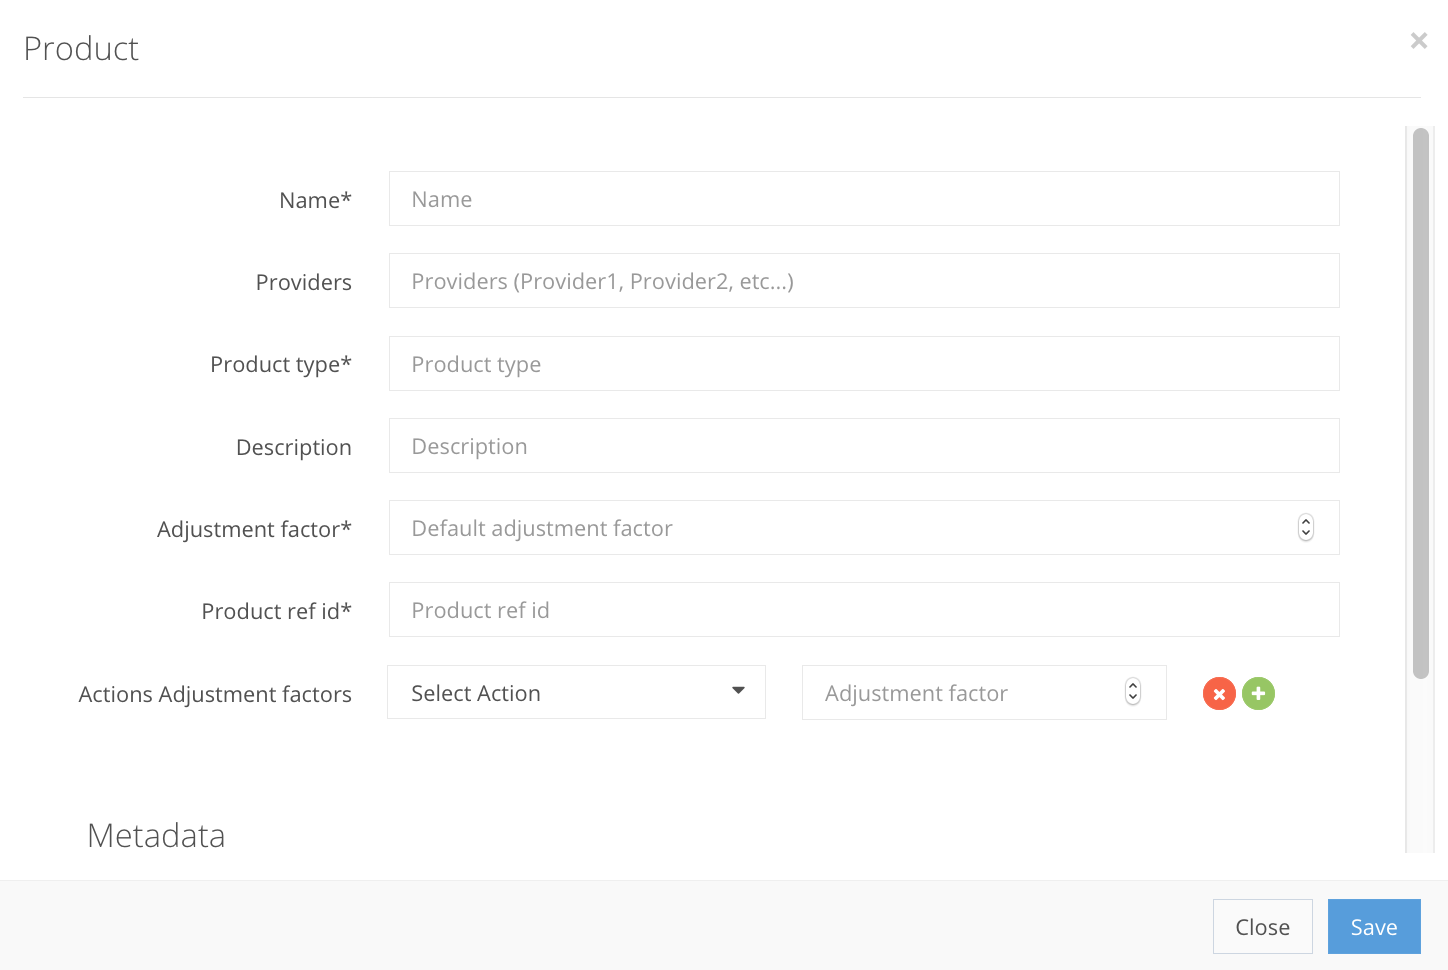
From Step 3, navigate to the Product Create/Edit screen, where you fill out the product information. If the product already exists, just add the Action Adjustment factor Win that we created. An example of a new Product creation is shown below.
Products fields
Name StringSet Name to – New Game
Providers StringN/A
Product Type StringSet Product type to – slot game
Description StringN/A
Adjustment factor IntegerSet the value to 1
Product ref id StringSet the Product ref id to – new_game
Action Adjustment factors StringBy selecting Action you can already preview the Action helper with the image. Select the created Win Action helper.
In the Adjustment factor insert a value 1
Metadata ObjectN/A
Step 5: Achievement creation
In your CompetitionLabs space, navigate to Achievements → List. To start creating an achievement, press Create, to get to the achievement creation page.
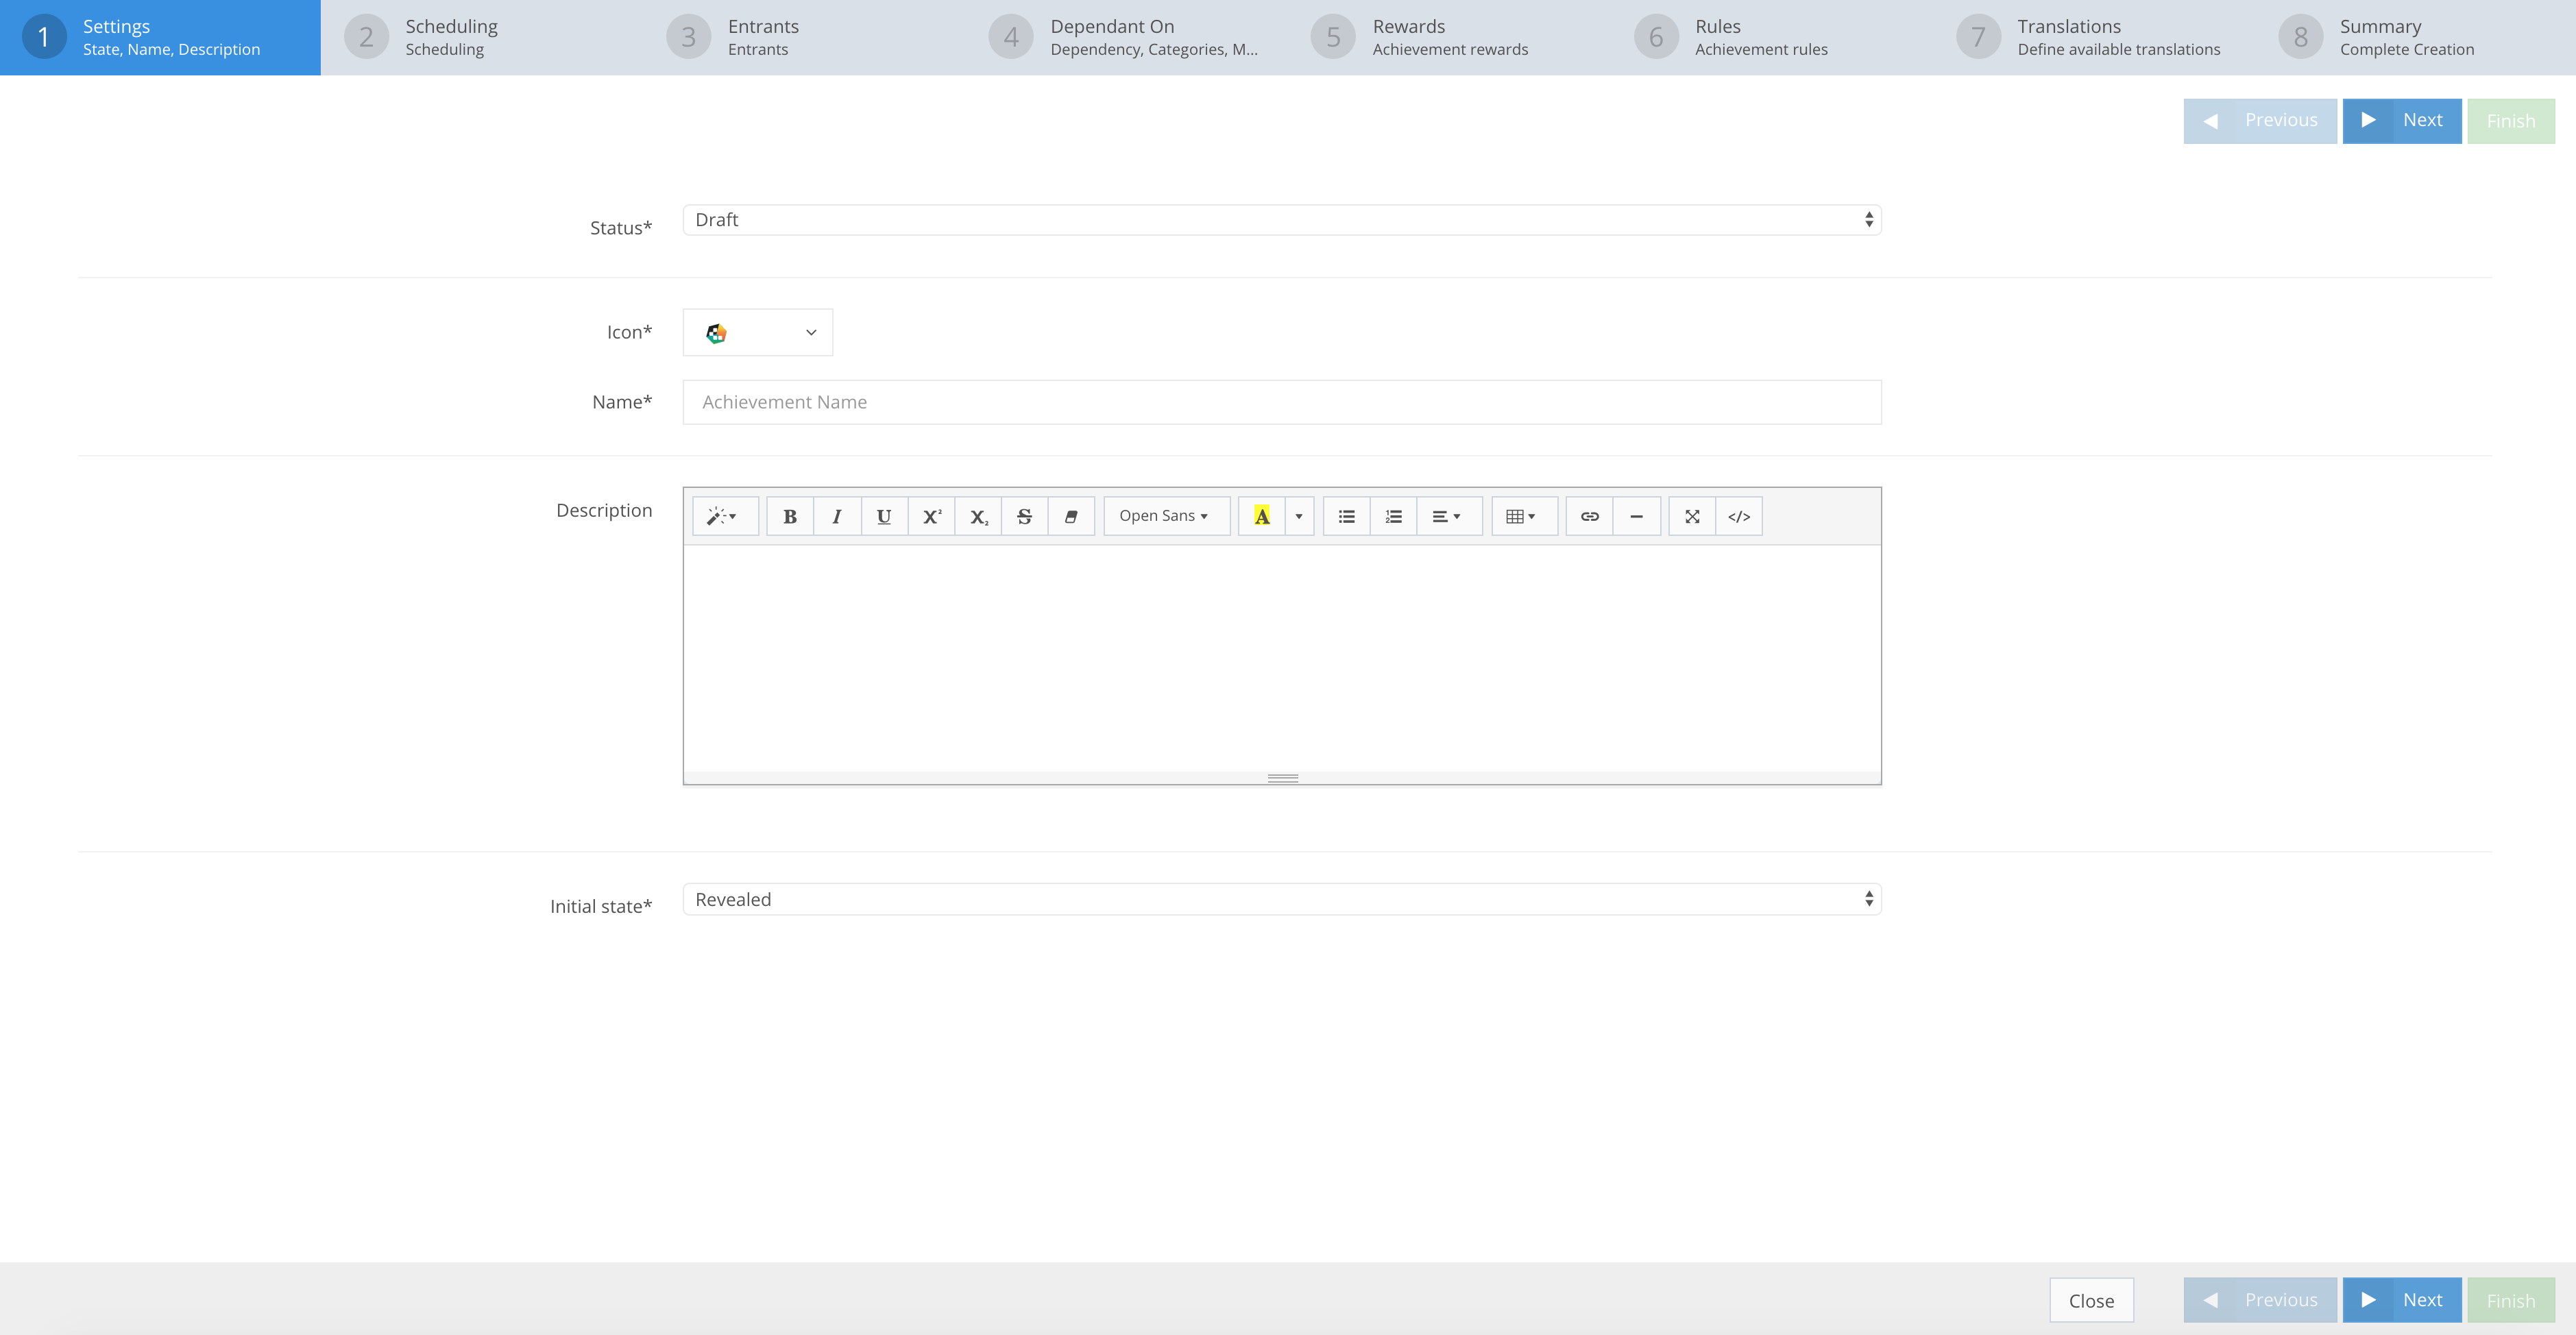
Step 1: Achievement settings
Status EnumSet status to – Draft
Icon StringSelect any preferable icon
Name StringCongratulations you won.
Description StringA value indicating how many achievements have been issued.
Initial State EnumSet state to – Hidden.
Step 2: Achievement scheduling
Available from DateTimePick a date and time when your Achievement is valid and it is available.
Available until DateTimeN/A
Occurrence EnumOnce.
Step 3: Achievement entrants
Member Groups Array[String]Leave as is – ALL.
Step 4: Achievement dependent on
Category StringN/A
Dependent On Array[Object]N/A
Metadata ObjectN/A
Step 5: Achievement rewards
Rewards Array[Object]N/A
Step 6: Achievement rules
An example below is shown of how Rules with an action that has an image attached to it looks like
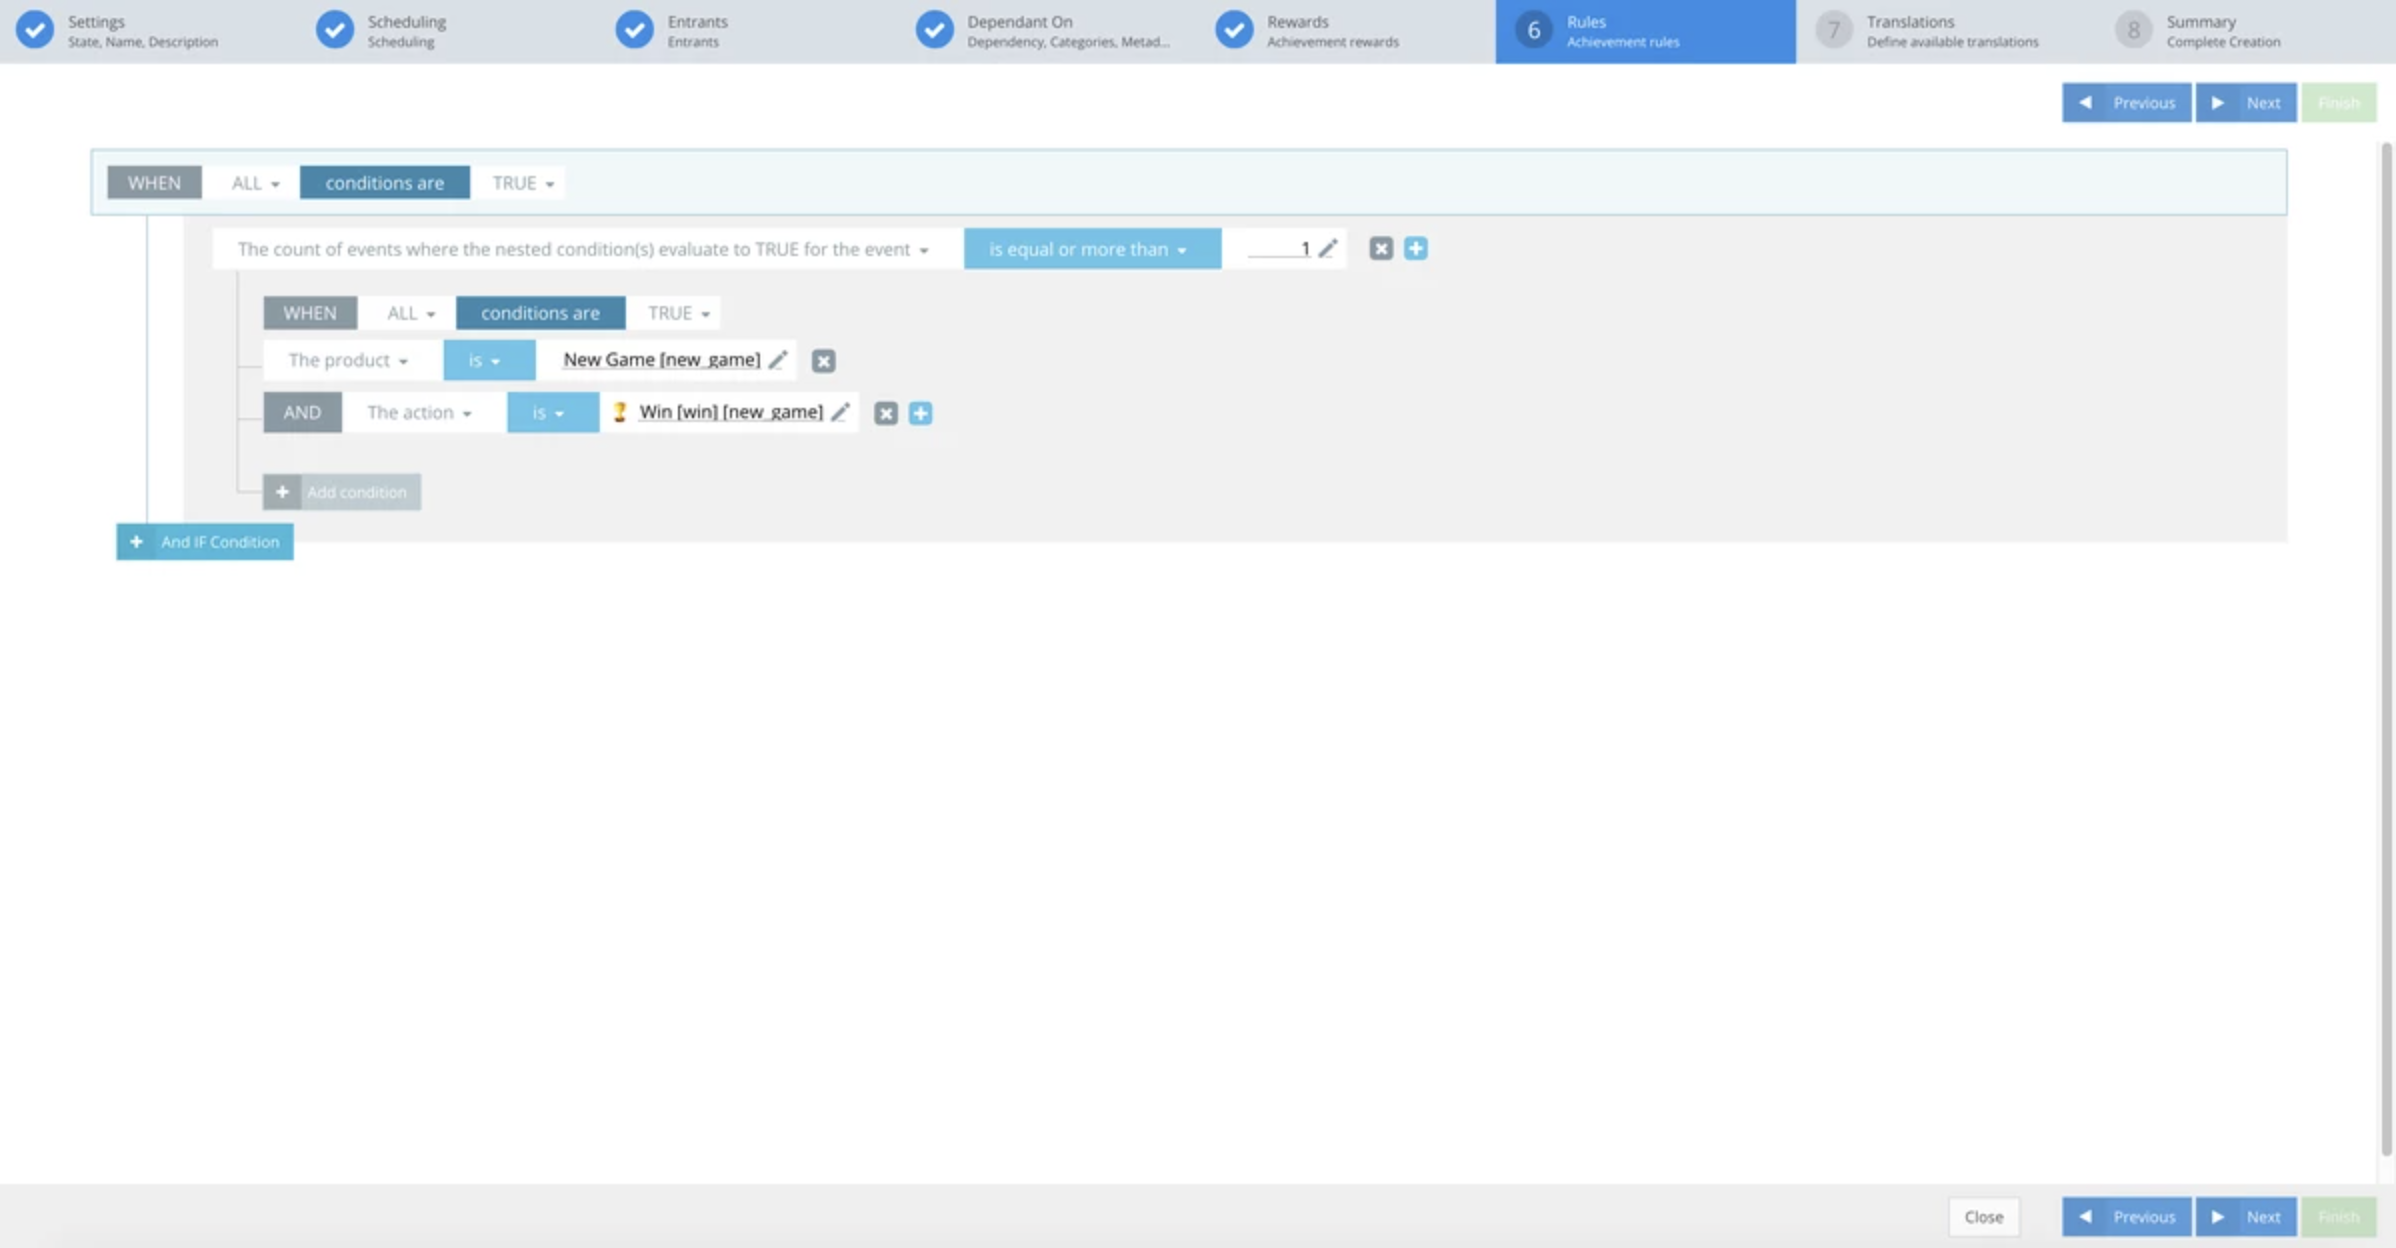 The Main rules fact is “The count of events where the nested condition(s) evaluate to TRUE for the event” the Main rules operator is “is” and the Main rules constant is “1“. The condition match of the Main rule is “ALL” and the evaluation criteria – “TRUE“. After that you need to add a Sub rule.
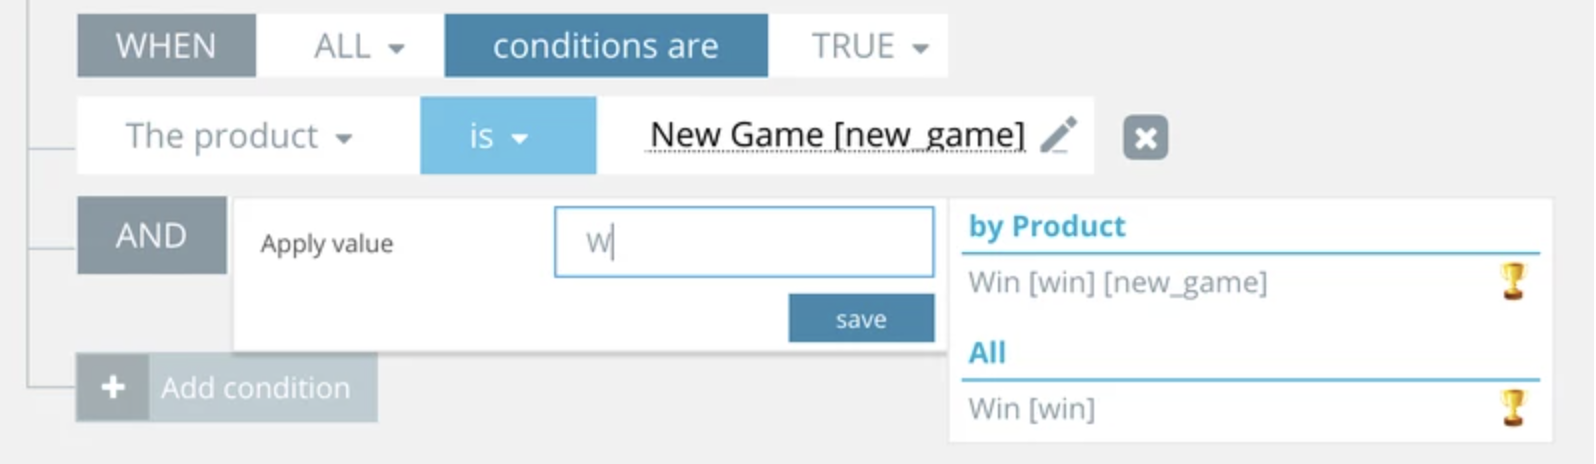
- The Sub rules fact is “The product” the Sub rules operator is “is” and the Sub rules constant is “New Game“. The condition match of the Sub rule is “ALL” and the evaluation criteria – “TRUE“.
- The Sub rules fact is “The action” the Sub rules operator is “is” and the Sub rules constant is “Win“. The condition match of the Sub rule is “ALL” and the evaluation criteria – “TRUE“.
 This can be done even without a product selection.
Step 7: Achievement translations
Languages Array[Object]N/A
Step 8: Achievement summary
Summary You can expand the Rules and preview the action with the image that was preselected earlier.
To finish creating the achievement press Finish and a second pop up screen appears for a confirmation of the achievements creation. Press Confirm and you have created an Achievement.